
CW Image Optimizer plugin for WordPress (Part 1)
Steps:
- Install CW Image Optimizer plugin on your WordPress website (Part 1)
- Connect to your server through SSH via the Command line (in this case MT) (great chance to learn a few basic commands if your new to the command line!) (Part 2)
- Installing littleutils on your hosting server provider (Part3)
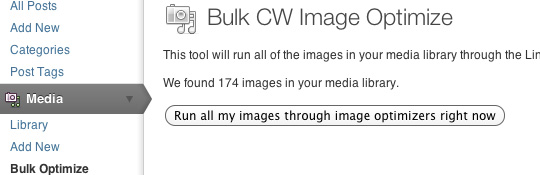
- Testing and using CW Image Optimizer (Part 4)
First of all, what is CW Image Optimizer? Here is the definition straight from the horses mouth:
“The CW Image Optimizer is a WordPress plugin that will automatically and losslessly optimize your images as you upload them to your blog. It can also optimize the images that you have already uploaded in the past.
Because CW Image Optimizer uses lossless optimization techniques, your image quality will be exactly the same before and after the optimization. The only thing that will change is your file size.
The CW Image Optimizer plugin is based on the WP Smush.it plugin. Unlike the WP Smush.it plugin, your files won’t be uploaded to a third party when using CW Image Optimizer. Your files are optimized using the Linux littleutils image optimization tools (available for free). You don’t need to worry about the Smush.it privacy policy or terms of service because your images never leave your server.
Why use CW Image Optimizer?
- Your pages will load faster. Smaller image sizes means faster page loads. This will make your visitors happy, and can increase ad revenue.
- Faster backups. Smaller image sizes also means faster backups.
- Less bandwidth usage. Optimizing your images can save you hundreds of KB per image, which means significantly less bandwidth usage.
- Super fast. Because it runs on your own server, you don’t have to wait for a third party service to receive, process, and return your images. You can optimize hundreds of images in just a few minutes.“
Now that we know how great this plugin could be, lets go ahead and install it! This is as easy as any WP plugin, either find the plugin here and install it manually. Or login into your WP website and navigate to >Plugins > Add New and enter CW Image Optimizer into the “Search Plugins” box click enter and you will see it at the top of the list. Click “Install Now”. Once it has finished navigate from Plugins > Installed Plugins and activate your new Image Optimizer!
But now the problem is that when you go to use this new plugin you will be prompted with a message saying that you need “littleutils” installed on your server for this plugin to work properly? So how do we do this? Well there is an explanation on the CW Image Optimization plugin page here, but the problem for some is that there’s a large assumption made that everyone would be able to follow these instructions. If you know your way around the command line, and you already have SSH access granted to you on your websites server then this is all you will need. For everyone else I thought it might be helpful to walk you through these steps:
- using SSH and SFPT (Part 2)
- Creating a “sudo” root user on a server (in this case Media Temple DV) (Part 3)
- Download, uncompress and install littleutils (Part 4)
First: Accessing the command line and some basic commands.
Stay tuned for Part 2 in which we will talk in greater detail about SSH and SFTP, what they are and how to take advantage of them.


About Author
I'm the curator here at designshifts.com as well as being a web developer by day. I have a passion for design and love to share inspiration and tips and tricks with the community.
I can’t find part 2? Would be really awesome if you had a guide how to install littleutils. Since I got no clue how to do it, and all of this it pretty new to me. WP Smush.it is also broken for the moment, so there’s really not an option to chose
Thanks for a great site btw!