
One-Two Punch for Outdoor Photography – Part One
By Marcus Brunnmeier
All images copyright Marcus Brunnmeier

One of the greatest challenges outdoor photographers frequently face is the fact that the sun, the brightest thing any of us has ever encountered, is our light source. In indoor photography lighting is usually soft and often comes from several distinct angles, filling in shadows for us. In outdoor photography, outside the golden hour (when the sun is within an hour of the horizon) light is often too hard to balance shadows and highlights aesthetically in a shot. In this tutorial I’ll cover what at this stage in my outdoor photography career has become the typical one-two punch I use on about 80% of my photos before I add them to my portfolio.
In a hurry, skip to the Summary at the bottom of part two.
Contrast Ratio
Before I write about the how of this method I will explain the why. Photographers are often geeks about this sort of thing because we know the more we understand principles behind what we are doing, the more creative and precise we can be with their applications. Why is bright sun and hard light a problem for cameras? After all, when I’m out on a bright sunny day I love the way everything is lit. When I lift my viewfinder to my face however, I’m confronted with a struggle where I have to choose what I want exposed correctly and what I’m willing to sacrifice.
In this photo, for example, I opted to keep the trees silhouetted. A longer exposure or bigger aperture would have resulted in the sun ruining the photo by blowing out the highlights in the sky for the sake of exposing the trees properly, like in the one below it. This is because of a thing called contrast ratio.
Contrast ratio is a fancy term for a simple concept. It describes the darkest thing in a system versus the brightest thing. If you’re talking about a monitor, a camera (still or video) or even the human eye, contrast ratio is important. And when you start looking at these numbers, well, the problem becomes obvious.

Modern HDTV: 5000:1
DSLR camera: 2048:1
Human eye: 10,000:1
Rrrrright. So is there a typo there? Nope. That difference is the problem. So the human eye can register something 10,000 times brighter than the darkest thing it can register. To us, anything outside this range registers simply as “as dark as dark” or “as bright as bright”. The same thing happens with your digital or film camera when you’re photographing something outside the range of the contrast ratio. Without getting into too much redundant detail (because there are entire careers to be made researching this topic, and I’ve really oversimplified it here) I’m going to keep moving.
Noise
In the case of devices that record light, like digital still cameras, the amount of light that hits the image sensor is regulated by an aperture. In the case of the eye, it’s your pupil. Like the pupil, apertures in a camera widen or narrow to accommodate light levels and shift the contrast range according to the scene. Without our pupil working for us, our eye would have a contrast ratio of only about 100:1. As all things are, this is a double edged sword. It means that during a sunset, as in the above photos, details in a photo that my camera could catch in a more forgiving lighting situation are now relegated to the darkest depths of the contrast range and my camera has to work to catch them as it would to catch light in any dark scene. Often this results in noise.
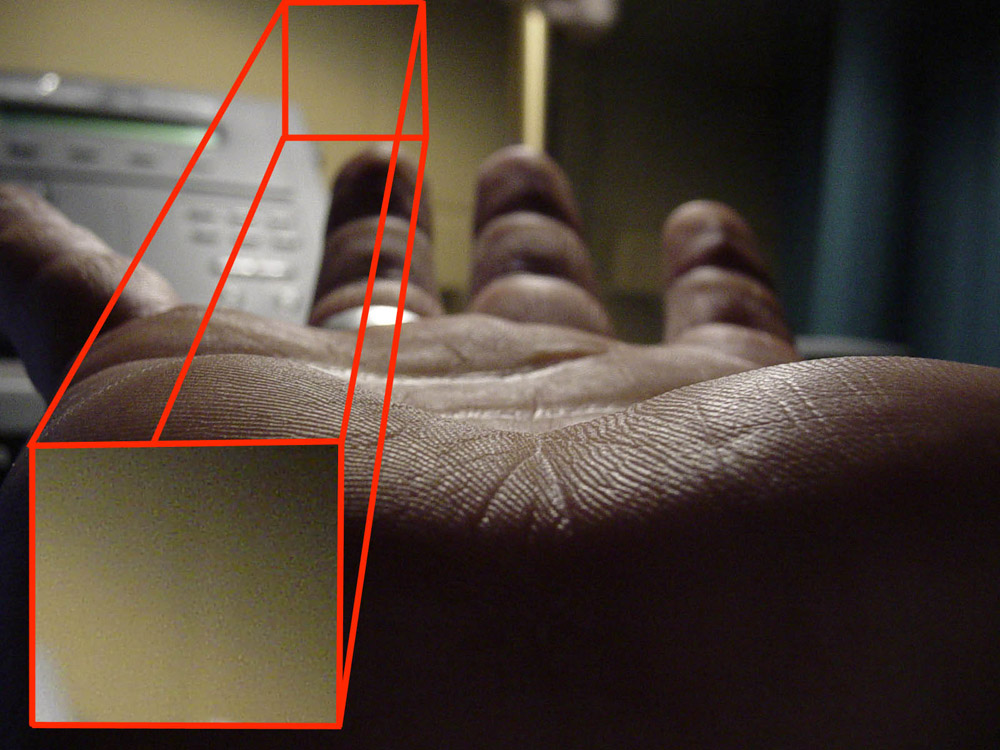
The noise in this image manifests itself as a graininess that is really obvious when magnified. If you want to crop your photos, that’s going to drop the resolution and exaggerate the effect of the noise. Noise results when the photosites in your image sensor (or receptors in the case of your eye) accidentally register light when there is no light. Why would this happen? If you want to see as well as possible in the dark, you have to have an image sensor that will fire at the slightest detection of light. That means that some sites on your image sensor will be so ready to fire, that they sometimes, randomly, fire by accident. Your eye does it, your camera does it. In fact cameras take it one step further and have an ISO setting, which increases the sensitivity of the sensor, so that the probability of the accidental firing is higher. This produces that grainy, pixelated effect. Once you notice it you can’t ignore it, and photos become unusable. What next?


About Author
There is wilderness everywhere, true and urban, peopled and desolate, in cities and oceans. Both contain complexity and simplicity. When they appear balanced, or one masquerades as the other, that makes photography that appeals to me - that's what I try to do.